
Most small business owners try SEO for a few weeks, see nothing happen, and quit.
That is not failure. That is a timeline problem.
SEO takes 90 to 120 days to show real results — but only if you do the right things in the right order. The problem is nobody tells you what the right order is. You get vague advice like “create quality content” and “build backlinks” without any specifics on what to do on Monday morning.
This guide fixes that.
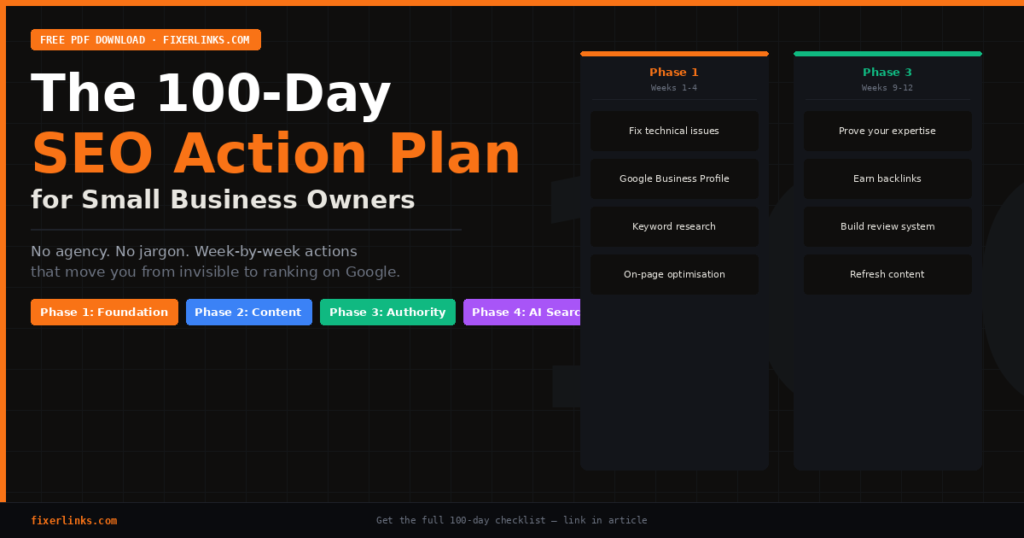
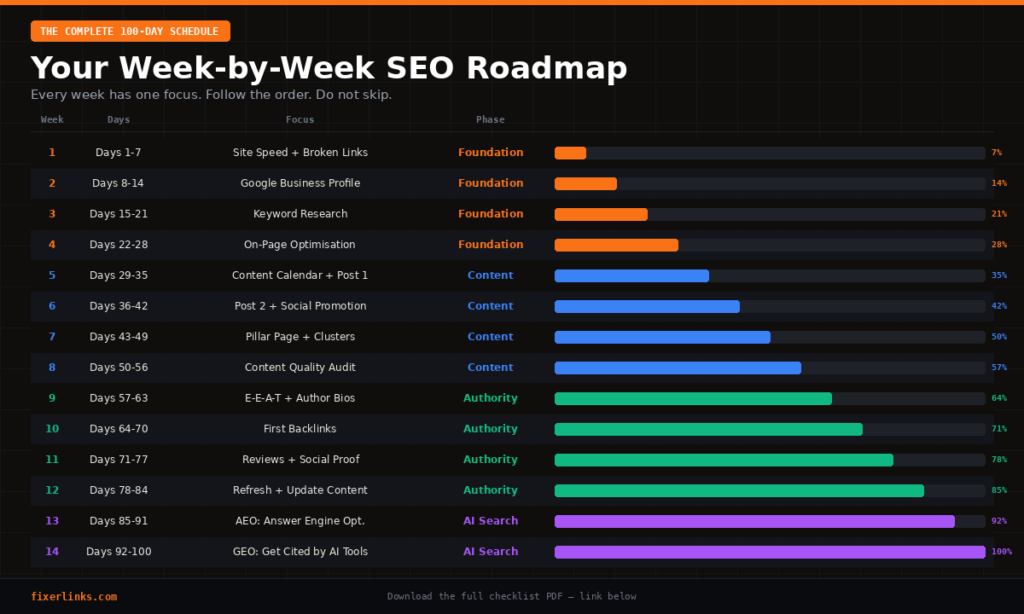
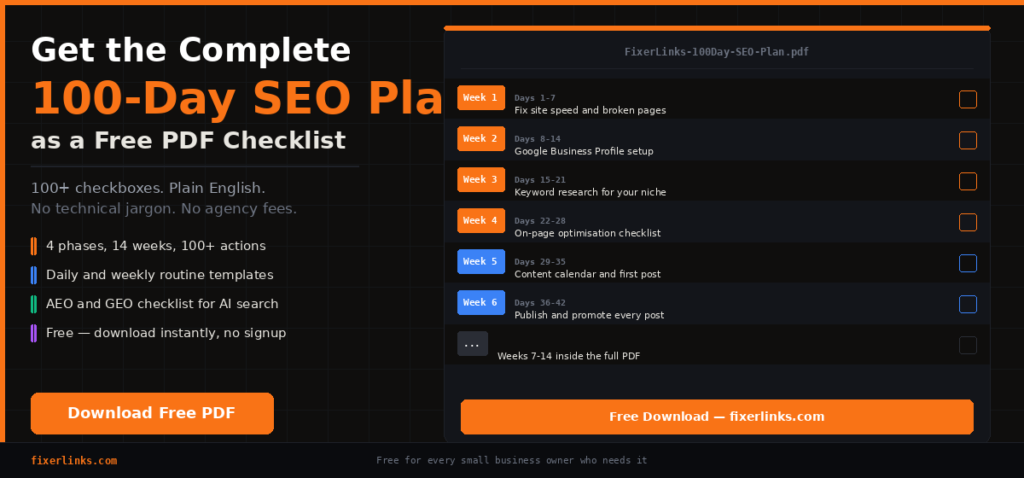
Below is the complete 100-day SEO action plan mapped week by week, day by day. Every action is written in plain English with no jargon, no technical complexity, and no agency required. If you have a website and a willingness to follow a plan, this is everything you need.
And if you want the entire thing as a printable PDF checklist — download it free at the bottom of this page.
Why Most Small Business Owners Fail at SEO
Before we get into the plan, let’s be honest about why SEO fails for most people.
The first reason is impatience. Google does not reward new content immediately. It watches your site over months to see if you are consistent, trustworthy, and genuinely helpful. Most people quit at week three — precisely when the foundation is almost done and the results are about to start.
The second reason is disorder. People write random blog posts without a strategy, tweak their homepage without understanding why, and chase shiny tactics they read about on Twitter without connecting them into a coherent system. Random actions produce random results.
The third reason is complexity. SEO blogs are written for SEO professionals, not small business owners. When someone new to SEO reads about “crawl budget optimisation,” “canonical tags,” or “TF-IDF analysis,” they close the tab and hire an agency — who often charges $2,000 to $5,000 a month to do things any motivated business owner could learn.
This plan eliminates all three problems. You follow it in order. You do one week at a time. You do not need to understand how Google works — you just need to follow the steps.
The Structure: 4 Phases, 14 Weeks, 100+ Actions
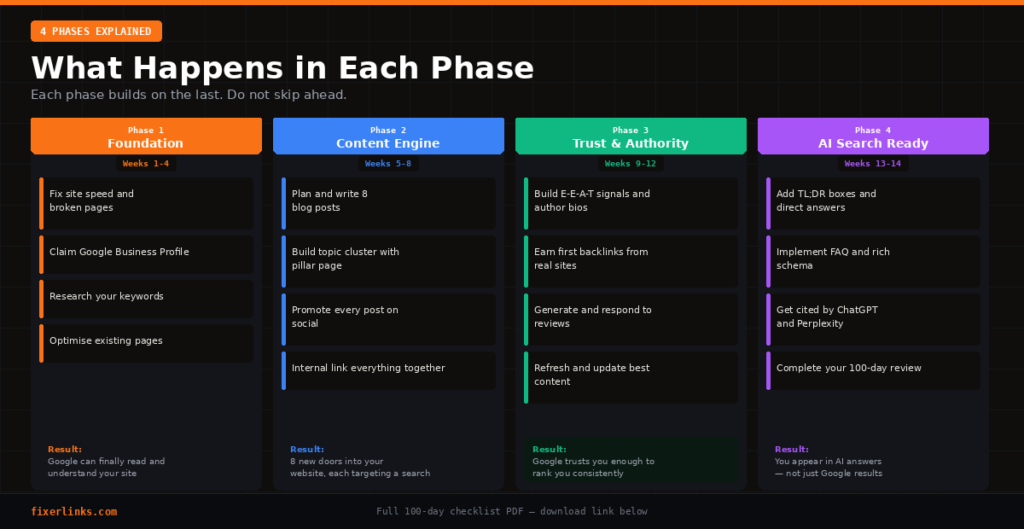
The plan is divided into four phases. Each phase builds directly on the last. Do not skip phases. Do not jump ahead.
Phase 1 — Foundation (Weeks 1 to 4): Fix what is broken before building anything new. Google cannot rank a broken website.
Phase 2 — Content Engine (Weeks 5 to 8): Create content your customers are searching for. Every blog post is a new door into your website.
Phase 3 — Trust and Authority (Weeks 9 to 12): Make Google trust you enough to rank you consistently. Content alone is not enough.
Phase 4 — AI Search Ready (Weeks 13 to 14): Optimise for the new reality — ChatGPT, Perplexity, and Google AI Overviews are now where millions of searches happen.
PHASE 1: THE FOUNDATION – Weeks 1 to 4
Week 1 – Days 1 to 7: Technical Health Check
Why this week matters: Google sends a robot to read your website. If your site is slow, has broken pages, or accidentally blocks the robot — you are invisible. This week fixes that.
Day 1 — Check your site speed Go to pagespeed.web.dev and type your website address. You want a score above 70 on mobile. Write down the top three suggestions. These are your priorities for the week.
Day 2 — Fix your biggest speed problem The most common speed killers for small business websites are uncompressed images and too many plugins. If your images are over 200KB each, use Squoosh.app (free) to compress them. If you have more than 15 active plugins, deactivate any you are not actively using.
Day 3 — Find and fix broken pages Go to Google Search Console. Click Coverage. Any page showing a 404 error is a broken link that wastes Google’s reading time on your site. Either restore the page or set up a redirect to the most relevant existing page. If you do not have Google Search Console set up, set it up today — it is free and essential.
Day 4 — Check and submit your sitemap Your sitemap is a map of your website for Google. Go to yoursite.com/sitemap.xml. If you see a list of your pages, you are good. If not, your RankMath or Yoast SEO plugin generates one in one click. Once it exists, submit the URL in Google Search Console under Indexing > Sitemaps.
Day 5 — Review your robots.txt file Go to yoursite.com/robots.txt. This file tells Google what it is and is not allowed to read. The most common mistake is accidentally blocking Google from reading your CSS or JavaScript files. If you see a line that says “Disallow: /wp-content/” on a WordPress site, that is a problem — remove it or ask a developer to fix it.
Day 6 — Check your site on mobile Over 65% of Google searches happen on mobile. Open your website on your phone. Does the text fit without zooming? Do buttons work? Are images loading correctly? If anything looks broken, this is the week to fix it — contact your theme developer or use your theme’s mobile settings.
Day 7 — Request indexing for your homepage In Google Search Console, use the URL Inspection tool and type your homepage URL. Click “Request Indexing.” This tells Google to visit your site immediately rather than waiting for its next scheduled crawl.
Want to Learn More About Technical SEO – Technical SEO Checklist : Best Fixes to Rank High
Week 2 – Days 8 to 14: Google Business Profile
Why this week matters: If you serve customers in any location, Google Business Profile is your single most powerful free SEO tool. It gets you into the map results — which appear above regular search results and get significantly more clicks.
Day 8 — Claim your Google Business Profile Go to business.google.com. Search your business name. If it already exists, claim it. If not, create it from scratch. This is completely free and takes 15 minutes.
Day 9 — Complete every field Name, address, phone number, website, business hours, and business category must all be filled in. Most businesses leave at least half the fields empty — this costs them rankings. Complete profiles consistently rank higher than partial ones.
Day 10 — Write your business description Write 150 to 300 words describing what you do, who you serve, what makes you different, and where you are located. Include your main service and your city naturally in the text — do not stuff keywords artificially.
Day 11 — Add 10 photos Businesses with photos get 42% more direction requests and 35% more website clicks than those without. Add your storefront, interior, products, team, and workspace. Real photos always outperform stock images.
Day 12 — Set up messaging and Q&A Enable the messaging feature so customers can contact you directly from Google Search. Also check the Q&A section — anyone can add questions about your business, including incorrect ones. Review and answer all existing questions.
Day 13 — Ask for your first 5 reviews Reviews are the single biggest factor in local search rankings. Send a personal message or email to your five best existing customers today. Give them the direct link to leave a Google review — do not just say “please review us.” The easier you make it, the more reviews you get.
Day 14 — Reply to every existing review Go through every review you already have and write a genuine reply to each one. Thank positive reviewers specifically. For negative reviews, apologise professionally and offer to resolve the issue offline. Google rewards businesses that engage with their customers.
Need to Understand the SEO cluster – SEO cluster 2026
Week 3 – Days 15 to 21: Keyword Research
Why this week matters: A keyword is simply the phrase your customer types into Google when they need what you sell. You must know these phrases before you write a single word of content.
Day 15 — List 10 phrases your customers would search Do not use any tools yet. Think like your customer. If you owned a plumbing business in Manchester, your customers might search “emergency plumber Manchester,” “boiler repair near me,” or “how to fix a dripping tap.” Write down 10 phrases from your customers’ perspective.
Day 16 — Use Google Autocomplete Type each of your 10 phrases into Google but do not press Enter. Look at the dropdown suggestions that appear. These are real searches people make right now. Write down every suggestion that is relevant to your business. These are your extended keyword list.
Day 17 — Mine the “People Also Ask” section Search each of your main keywords on Google. Scroll down until you see the “People Also Ask” box. Click each question to expand it — more questions appear as you do. These are the exact questions your customers are asking. Every question you see is a potential blog post.
Day 18 — Use Google Search Console to find hidden keywords Go to Google Search Console > Performance > Search Results. Sort by Impressions. You will see keywords that Google is already showing your site for — even if you did not target them intentionally. Any keyword with many impressions but few clicks is a gap you can close quickly.
Day 19 — Group your keywords by type Sort your keyword list into three groups: Informational (questions starting with how, what, why — these become blog posts), Commercial (phrases like “best” or “review” — these go on comparison or service pages), and Transactional (phrases like “hire,” “buy,” or “book” — these go on your contact or service pages).
Day 20 — Identify your 3 most important keywords These go on your homepage. Choose the phrases that most accurately describe your main service and your location if you are a local business. These are what you most want to rank for within 100 days.
Day 21 — Map keywords to pages Create a simple spreadsheet. List every page on your site and assign each page one primary keyword. No two pages should target the same keyword — this is called keyword cannibalization and it hurts rankings.
Week 4 – Days 22 to 28: On-Page Optimisation
Why this week matters: Before creating new content, make your existing pages as strong as possible. Small tweaks to existing pages often produce faster ranking improvements than writing new content.
Day 22 — Write a proper page title for every page Your page title is the blue clickable link people see in Google results. Every page must have one. It should include your primary keyword and be under 60 characters. Example: “Emergency Plumber Manchester — Available 24/7 | Smith Plumbing.”
Day 23 — Write a meta description for every page This is the two-line description that appears under the blue link in Google. Write it like an advertisement — make people want to click. Include your primary keyword naturally. Keep it under 155 characters. If you skip this, Google writes its own — which is often poor.
Day 24 — Check and fix your H1 headings Every page should have exactly one H1 heading. It is the biggest heading at the top of the page. It must include your primary keyword. In WordPress, this is usually your page title — but check that RankMath confirms it is set correctly.
Day 25 — Add alt text to every image Alt text is a written description of your image that Google reads. In WordPress, click any image and add a description in the Alt Text field on the right panel. Include your keyword where it makes sense naturally — do not just stuff the keyword into every image.
Day 26 — Check your URL structure Your URLs should be short, readable, and include your keyword. A URL like yoursite.com/services/emergency-plumber-manchester is good. A URL like yoursite.com/?p=4721 is bad. Change bad URLs in WordPress under Edit Page > Permalink — but always set up a redirect from the old URL to the new one.
Day 27 — Run RankMath on every key page Open each of your five most important pages in WordPress. Look at the RankMath score in the right panel. Fix every item shown in red, then in orange. Do not publish or move forward until your key pages score at least 70.
Day 28 — Phase 1 review Open Google Search Console and take a screenshot of your current stats. This is your baseline. Write down: total clicks last 28 days, total impressions, average position. You will compare this to Day 100 to measure your results.
PHASE 2: THE CONTENT ENGINE – Weeks 5 to 8
Week 5 – Days 29 to 35: Plan Your Content Calendar
Why this week matters: Posting randomly does not work. Every piece of content must target a specific keyword and fit into a deliberate strategy.
Day 29 — Plan 8 blog posts Use the People Also Ask questions you collected in Week 3. Each question becomes one blog post. You need 8 posts total — one for each week of Phases 2 and 3. Write the titles down now.
Day 30 — Create your content calendar Decide which post goes live on which date. Publish at minimum once per week. Twice per week if you can manage it. Consistency matters more than volume — Google rewards sites that publish regularly.
Day 31 — Write Post 1 Pick the question your customers ask most frequently. Answer it completely and honestly. Use simple language as if explaining to a friend. Aim for 1,200 words minimum. Include your keyword in the title, the first paragraph, at least one H2, and naturally throughout.
Day 32 — Add internal links to Post 1 Link to at least two other pages on your website from inside the blog post. This helps Google understand how your content connects and keeps readers on your site longer.
Day 33 — Add images to Post 1 Add at least two images. Write descriptive alt text for each one. If you do not have original photos, use free images from Unsplash.com — always choose ones that are genuinely related to your topic.
Day 34 — Optimise Post 1 in RankMath Set your focus keyword. Write your meta title and meta description. Check that your score is 70 or above. Click Publish only when RankMath is satisfied.
Day 35 — Request indexing for Post 1 In Google Search Console, paste your new post URL into the URL Inspection tool and click Request Indexing. Do this for every new post you publish throughout the plan.
Week 6 – Days 36 to 42: Publish and Promote
Day 36 — Write and publish Post 2 Follow the same structure as Post 1. Different keyword, different question, same quality standard.
Day 37 — Promote Post 1 on LinkedIn Write a short 4 to 6 line post about the topic. Include a hook in the first line. Put the article link in the first comment — not in the post body. LinkedIn suppresses posts with external links in the main text.
Day 38 — Create a Pinterest pin for Post 1 Design a simple vertical graphic in Canva using your brand colours and the post title in large text. Write a keyword-rich pin description. Pin it to a relevant board. Pinterest drives long-term traffic that keeps coming months after posting.
Day 39 — Promote Post 2 on LinkedIn and Pinterest Repeat the same process for your second post. Post on LinkedIn, create a pin, add the article link in the comment.
Day 40 — Email your subscribers about both posts Send a short email to your MailerLite list. Mention both new posts. Include the direct links. Your subscribers visiting your posts sends a positive engagement signal to Google.
Day 41 — Reply to every comment and message Check LinkedIn, Pinterest, and your website comment section. Reply to everyone who engaged. Engagement signals that your content is valuable to both platforms and to Google.
Day 42 — Week 6 review Check Google Search Console. Are your two posts appearing in impressions? Are any keywords showing position data? Even if clicks are zero, impressions mean Google is beginning to register your content.
Week 7 – Days 43 to 49: Build Your Topic Cluster
Day 43 — Create your pillar page A pillar page is your most complete guide on one big topic. For FixerLinks, this might be “The Complete Guide to Hiring a Freelancer in 2026.” For your business, it should be the one topic you most want to own. This page should be 2,000 words or more and link to all your related posts.
Day 44 — Link all related posts back to the pillar Edit every blog post you have published and add a link back to the pillar page somewhere relevant in the content. This creates a cluster — a network of related content that Google reads as deep expertise on one subject.
Day 45 — Write and publish Post 3
Day 46 — Write and publish Post 4
Day 47 — Update your homepage to feature your blog Add a section to your homepage showing your three most recent blog posts. Label it something clear like “Free Guides” or “Latest Resources.” This tells Google your blog is important content on the site.
Day 48 — Add your pillar page to your main navigation If your pillar page covers your most important topic, it deserves a spot in your website navigation. This increases the internal links pointing to it, which signals its importance to Google.
Day 49 — Check indexing status of all published content Go through every URL you have published in the last three weeks. Check each in Google Search Console URL Inspection. Any page showing “not indexed” should have indexing requested immediately.
Week 8 – Days 50 to 56: Content Quality Audit
Day 50 — Read every post as a first-time visitor Open each post and read it start to finish. Ask yourself: if I searched this question on Google and found this page, would I be satisfied with the answer? If anything feels thin or incomplete, add to it today.
Day 51 — Add FAQ sections to every post At the bottom of each blog post, add three to five questions and short direct answers. Write the question in a heading tag and the answer in two to three sentences underneath. Google frequently pulls these into the featured snippets at the top of search results.
Day 52 — Enable FAQ Schema in RankMath In RankMath settings, enable the FAQ Block schema. When you add FAQ sections in WordPress using the RankMath FAQ Block, the schema is automatically generated. This helps Google display your answers directly in search results.
Day 53 — Write and publish Post 5
Day 54 — Write and publish Post 6
Day 55 — Update your best post with new information Find the post with the most views in Google Analytics. Add a new section, update any facts or numbers, expand any section that feels thin. Change the “Last updated” date at the top of the post. Freshness is a ranking signal.
Day 56 — Write and publish Post 7 and Post 8 Complete your eight-post content cluster. You now have a real content foundation for Google to evaluate.
PHASE 3: TRUST AND AUTHORITY — Weeks 9 to 12
Week 9 – Days 57 to 63: Prove Your Expertise
Why this week matters: Google’s E-E-A-T system (Experience, Expertise, Authoritativeness, Trustworthiness) rewards content written by demonstrably real experts. This week you prove you are one.
Day 57 — Create a genuine About page Who are you? How long have you been doing this? What results have you achieved for yourself or customers? What makes you qualified to write about this topic? Include a professional photo. Be specific — vague about pages do not build trust with Google or readers.
Day 58 — Build a proper author bio In WordPress, go to Users > Your Profile and fill in the Biographical Info section. Include your professional background, your LinkedIn URL, and your relevant experience. This bio appears on every blog post and proves a real human expert wrote the content.
Day 59 — Add first-person experience to every post Go back through each of your eight blog posts and add at least one sentence of first-hand experience: “In my experience working with small businesses, I have found that…” or “When I tested this approach myself…” AI cannot fabricate genuine experience. You can provide it.
Day 60 — Collect three testimonials Message three customers who have had a good experience with you and ask them to write a short testimonial. Ask them to be specific about the results they got. Add these to your homepage and services page.
Day 61 — Add trust signals to your homepage Display any certifications, accreditations, memberships, awards, or media mentions you have. Even a simple “Trusted by 50+ businesses” with a count of your customers increases both Google trust signals and visitor conversion rates.
Day 62 — Create a Resources or Tools page A free resources page that links to useful tools, guides, and your own blog posts signals that you are genuinely trying to help your audience. This type of page also attracts backlinks naturally over time.
Day 63 — Review your E-E-A-T signals Look at your site through Google’s eyes. Is it clear who wrote this content? Is there evidence this person has real experience? Are there trust indicators? Does the site look and feel like a real legitimate business? Fix any gaps you find.
Week 10 – Days 64 to 70: Earn Your First Backlinks
Why this week matters: A backlink is when another website links to yours. Google treats each one as a vote of confidence. One quality backlink from a trusted site moves the needle more than ten new blog posts.
Day 64 — List 10 websites that could link to you Think: local business directories, industry associations, suppliers, business partners, local newspapers, community websites, Chamber of Commerce. List them all.
Day 65 — Submit to free business directories Create or claim listings on Google Business Profile (done), Bing Places, Apple Maps, Yell.com, Yelp, Yellow Pages, and any industry-specific directories. These are free and give you instant backlinks from established, trusted domains.
Day 66 — Ask a business partner to link to you Email a supplier, partner, or colleague you have a genuine relationship with. Say: “We mention you on our website — would you be happy to add a link to us on yours?” Most will say yes. This is one of the most effective and overlooked backlink strategies for small businesses.
Day 67 — Pitch a guest post Find one blog, local publication, or industry website that publishes guest articles. Pitch a helpful, specific article idea. When published, you receive a backlink in your author bio. Start local or niche — the relevance of the link matters more than the size of the site.
Day 68 — Create a linkable asset A linkable asset is something valuable enough that other websites want to reference it. A free checklist, a set of statistics, a case study, a useful tool. Your 100-day SEO plan PDF is a perfect example. Publish it on your site and other sites will link to it when they reference it.
Day 69 — Reclaim unlinked brand mentions Search Google for your business name. If any websites mention you without linking to you, email them and politely ask if they would add a link. Most will — they already reference you, so adding a link is a small extra step for them.
Day 70 — Check your backlink profile Use the free version of Ahrefs or Semrush to see which sites currently link to you. Note your current number of referring domains. This is your baseline — you will compare this at Day 100 to measure progress.
Week 11 – Days 71 to 77: Reviews and Social Proof
Day 71 — Set a target of 10 Google reviews If you already have some, calculate how many more you need. Make a list of past customers you will contact this week.
Day 72 — Send personal review requests Do not use a generic template. Send a personal message or email that references your specific work together. Include the direct link to leave a Google review. Send to five customers today.
Day 73 — Send review requests to the remaining five customers
Day 74 — Add aggregate review schema to your website In RankMath, go to Schema settings and add an Aggregate Rating schema. This can display your star rating directly in Google search results, dramatically increasing your click-through rate without changing your ranking position.
Day 75 — Create an automated review request In MailerLite, create a simple automated email that sends to new customers 7 days after they first contact you. Write it in three sentences: thank them for their business, ask how their experience was, and give them the direct link to leave a Google review. Set it and forget it.
Day 76 — Add testimonials to your highest-traffic pages In Google Analytics, find your three most visited pages. Add at least one customer testimonial to each. Social proof converts visitors into enquiries — and more time spent on your pages signals quality to Google.
Day 77 — Week 11 review Check your review count on Google Business Profile. Check your Search Console stats for the month. Compare your current clicks and impressions to your Day 28 baseline. You should see growth at this point.
Week 12 – Days 78 to 84: Refresh, Prune, and Update
Day 78 — Find your best-performing pages In Google Search Console, go to Performance > Search Results. Sort by Clicks. These are your winners — the pages driving real traffic. These deserve more attention and investment.
Day 79 — Update your top 3 posts For each of your top three posts, add new information, expand any thin sections, update any statistics, and add one new FAQ question at the bottom. Refresh the published date to today. Updated content frequently jumps five to ten positions within two weeks.
Day 80 — Find pages with impressions but no clicks In Search Console, filter by Impressions. Look for pages that appear in search results but nobody clicks. Your title or meta description is not compelling enough. Rewrite them — make them more specific, more intriguing, or more clearly beneficial.
Day 81 — Identify and improve thin content Any page under 400 words that gets zero traffic in 90 days is a liability. Either expand it significantly or redirect it to a stronger related page. Thin content drags down your entire site’s quality assessment.
Day 82 — Build a content brief for the next 8 posts You have now seen which topics resonate. Use that data to plan your next eight posts. Write the title, target keyword, and three main points for each. You are now running the content process on intelligence, not guesswork.
Day 83 — Internal link audit Every post you have published should link to at least two others. Every post should have at least one other post linking back to it. Use RankMath’s internal link suggestions to find gaps and fix them.
Day 84 — Phase 3 checkpoint You should now have the following complete: A full About page and author bio on every post. At least three new backlinks from external sites. A Google review count that is growing. Eight blog posts published and internally linked. A clear picture of what is working from your Search Console data.
PHASE 4: AI SEARCH READY – Weeks 13 to 14
Week 13 – Days 85 to 91: AEO – Answer Engine Optimisation
Why this week matters: Google’s AI Overviews, ChatGPT Search, and Perplexity now answer millions of queries directly without users clicking any links. If your content is not structured for these AI engines, you are invisible to a growing share of searchers. AEO is how you fix that.
Day 85 — Add TL;DR boxes to every long post Immediately after your H1 heading on every post over 800 words, add a box containing three to four bullet points summarising the key takeaways. Label it “Quick Summary” or “TL;DR.” AI tools scan these summaries and frequently quote them directly in their answers.
Day 86 — Put the direct answer in the first 50 words For every blog post that answers a question, restructure the introduction so the direct answer appears in the first 50 words. AI tools — and Google’s featured snippets — reward pages that answer immediately rather than burying the answer after three paragraphs of introduction.
Day 87 — Reformat key sections as explicit Q&A Identify the most question-based sections of your five best posts. Rewrite them in clear Q&A format — bold the question as a heading, then answer it directly in two to three sentences underneath. This is the format AI engines are specifically trained to extract.
Day 88 — Add FAQ Schema to your top 10 pages In RankMath, ensure FAQ schema is enabled and implemented on your most important pages. FAQ schema tells Google and AI engines: these are questions and answers — pay attention to this section. Pages with proper FAQ schema get cited in AI answers at a significantly higher rate.
Day 89 — Use clear, declarative language Review your content for vague, qualifying language: “it might,” “some people think,” “arguably.” Replace it with confident, factual statements. AI tools prefer citing sources that state things clearly and definitively. Hedged language makes your content less citable.
Day 90 — Check if AI tools know your brand Open ChatGPT and type: “What is [your business name]?” Then try Perplexity.ai with the same query. If the tools do not know you exist or give inaccurate information, you need more digital PR — more external mentions, more directory listings, more guest posts that reference your business by name.
Day 91 — Optimise your most important page for AI citation Take your pillar page or homepage and apply all of the above: TL;DR box, direct answer first, clear Q&A sections, FAQ schema, declarative language. This single page, fully optimised for AEO, can drive consistent AI citation for months.
Week 14 – Days 92 to 100: GEO — Generative Engine Optimisation
Why this week matters: GEO takes AEO one step further. It is about becoming the source that AI tools actively cite when they generate answers — not just appearing in regular search results. The businesses that achieve this receive traffic from AI platforms without requiring a single click.
Day 92 — Add specific statistics and data to your content AI tools prefer citing specific, verifiable data over vague claims. Go through your five best posts and add real numbers wherever possible. “43% of small businesses struggle to get their first Google ranking” is significantly more citable than “many small businesses struggle with SEO.” If you do not have original data, cite publicly available research and link to the source.
Day 93 — Embed a YouTube video in your top 5 posts Google owns YouTube. Pages with embedded YouTube videos consistently rank higher and appear fresher to Google’s algorithm. A simple talking-head video, screen recording, or slideshow walkthrough is enough. Embed the video near the top of your post, not buried at the bottom.
Day 94 — Create VideoObject schema for embedded videos In RankMath, when you add a video to a page, add the VideoObject schema to it. This tells Google: there is a video here, this is its title, this is its description, this is when it was published. Rich video schema increases the chance of your video appearing in Google’s video carousel.
Day 95 — Claim your brand across all platforms AI tools verify business legitimacy by cross-referencing mentions across the web. Claim your profile on: LinkedIn, Twitter/X, Instagram, Facebook, Pinterest, Crunchbase, and any industry-specific platforms. Ensure your business name, address, and website are consistent across all of them. Inconsistencies confuse AI verification systems.
Day 96 — Update your schema with complete business information In RankMath’s Local SEO settings, fill in every single field: business name, complete address, phone number, email, description, founding date, all social media profile URLs, accepted payment methods, and service areas. The more complete your schema, the more AI tools trust that your business is real and established.
Day 97 — Build your brand mention footprint AI tools are trained on content from across the web. The more times your business name appears in trustworthy external sources, the more the AI “knows” you. This week, look for three new opportunities to get mentioned externally: a local news story, an industry podcast interview, a guest contribution on a relevant blog, or a quote in a journalist’s article.
Day 98 — Create a statistics or data page on your site A dedicated page that compiles relevant statistics in your niche is one of the most powerful GEO assets you can build. Other websites and AI tools cite statistics constantly. If your site is the source of the statistic, you get the citation. Pull together 10 to 20 relevant statistics about your industry, format them clearly, and publish the page.
Day 99 — Complete your 100-day content and technical review Open Google Search Console. Run through this checklist:
- Total clicks vs Day 1 baseline
- Total impressions vs baseline
- Number of pages indexed vs Day 1
- Average position for your three main keywords
- Number of referring domains vs Day 70 baseline
- Number of Google reviews vs Day 13 Write every number down. This is your proof of progress.
Day 100 — Plan your next 100 days SEO is not a project with an end date. It is a process that compounds. The results you see on Day 100 are the foundation, not the ceiling. Use the data from Day 99 to identify your three biggest opportunities for the next cycle: the posts that need expanding, the keywords you are close to ranking for, the backlink sources you have not yet pursued. Start the next sprint with everything you have learned.
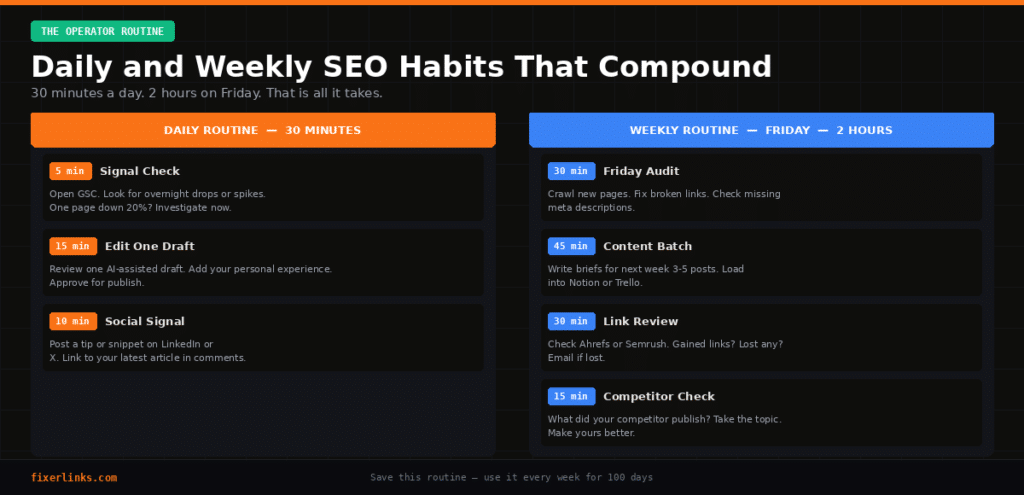
The Daily Routine That Makes This Work
Following a 100-day plan only works if the daily habits are sustainable. Here is the minimum viable routine:
Every morning — 30 minutes Five minutes in Google Search Console checking for significant drops or spikes. Fifteen minutes reviewing and editing one piece of content. Ten minutes posting one SEO-relevant insight or article snippet on LinkedIn or X with the article link in the comment.
Every Friday — 2 hours Thirty minutes crawling your new pages for broken links and missing meta descriptions. Forty-five minutes writing content briefs for next week’s posts. Thirty minutes reviewing your backlink profile for gains and losses. Fifteen minutes reviewing what your main competitor published this week.
First Monday of every month — 1 hour Looking at your 90-day trajectory in Search Console. Killing or merging content that is consistently underperforming. Launching a new outreach initiative for backlinks. Planning the next month’s content cluster.
Download the Free PDF Checklist
Everything in this guide is also available as a printable PDF checklist with checkboxes for every single action across all 100 days. Download it free — no email required.
Print it, pin it on your wall, and check boxes every day for 100 days. The business owners who follow plans like this consistently outrank those who do not — not because they are smarter, but because they showed up every day when their competitors did not.
Need Help Executing Any Part of This Plan?
Some parts of this plan are genuinely technical — fixing redirect chains, implementing schema, improving page speed, or building your first backlinks. If you hit a wall at any point, FixerLinks matches you with vetted, 4.8-star Fiverr specialists who handle exactly these tasks.
Visit fixerlinks.com and describe what you need. We will match you with the right person within minutes, not hours.
Frequently Asked Questions
How long before I see results from this plan? Most business owners see their first meaningful movement in rankings between days 45 and 60 — usually increased impressions in Google Search Console before they see actual clicks. Significant traffic increases typically appear between days 70 and 100, provided the plan is followed consistently.
Do I need to buy any tools to follow this plan? No. The plan is built around free tools: Google Search Console, Google Analytics, Google Business Profile, PageSpeed Insights, RankMath free tier, and MailerLite free tier. Paid tools like Ahrefs or Semrush are mentioned but optional.
I have a brand new website. Will this plan still work? Yes, but with adjusted expectations. Brand new websites with zero domain authority typically take an additional 30 to 60 days to see ranking movement compared to established sites. Start the plan from Day 1 and be patient through the first phase — the foundation work is especially critical for new sites.
What if I skip a week? Resume from where you left off. Do not try to catch up by doubling up — the quality of each action matters more than completing it on a specific day. If you miss Week 6, do Week 6 content when you return, then Week 7, and so on.
What is the difference between AEO and GEO? AEO (Answer Engine Optimisation) is about structuring your content so AI tools can extract and use your answers. GEO (Generative Engine Optimisation) is about building the external credibility and data richness that makes AI tools actively cite your site as a source. AEO changes how you write. GEO changes how widely your brand is known and referenced across the web.
Can I hire someone to do parts of this for me? Absolutely — and for some tasks like technical fixes, link building, or content writing, hiring a specialist is often faster and more effective than doing it yourself. Visit fixerlinks.com for free matching with vetted freelancers for any task in this plan.
[Download the free PDF checklist at fixerlinks.com/100-day-seo-plan — print it, check the boxes, and see you on Day 100.]